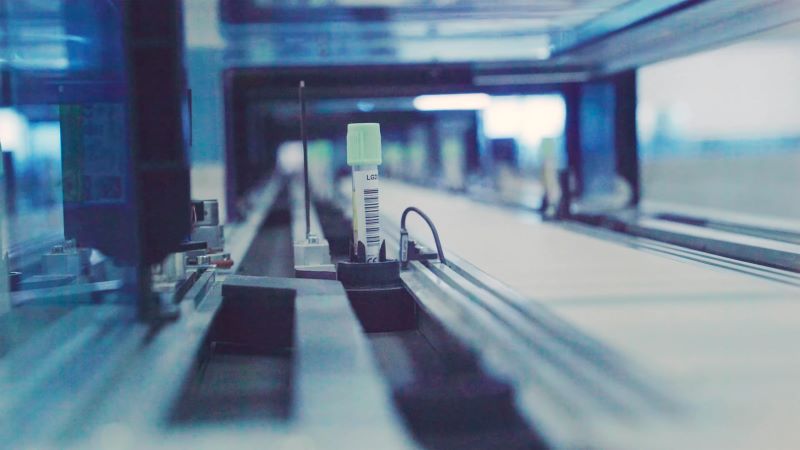
Laboratories today are a hub of intricate processes, detailed analyses, and precise results. One tool that has significantly transformed laboratory operations is the laboratory barcode.
This guide explores the ins and outs of laboratory barcodes, showcasing their benefits, applications, and how to use them effectively.
What is a Laboratory Barcode?
A laboratory barcode is a representation of information used to label and track samples, reagents, and other lab items.
These barcodes can be linear (black and white bars) or 2D (a grid of squares), encoding data that barcode readers can quickly scan and interpret.
Benefits of Laboratory Barcodes in Specific Applications
1. Sample Management
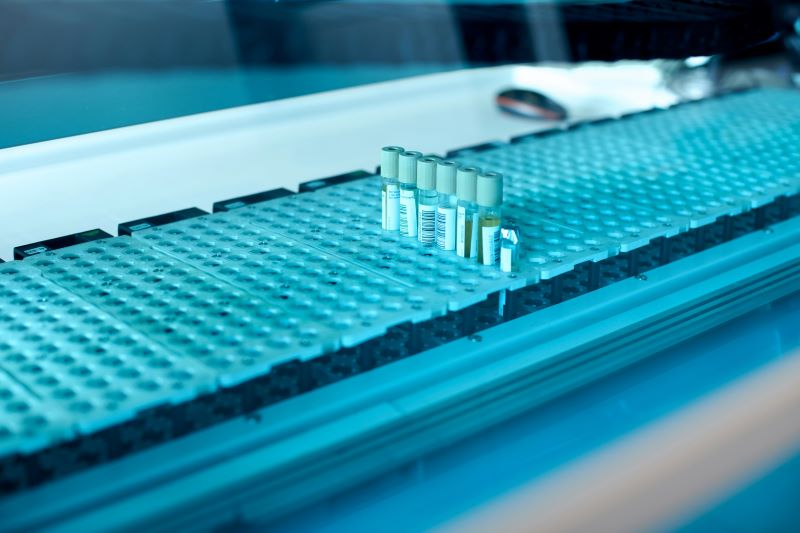
Barcodes play a crucial role in sample management. From collection to analysis and storage, barcodes ensure that each sample is accurately identified and tracked, minimizing the risk of mix-ups and contamination.
2. Inventory Control
Laboratory barcodes simplify inventory management by providing real-time data on the availability of reagents and supplies. This helps in maintaining optimal stock levels and reducing waste.
3. Quality Assurance
By enabling detailed tracking and recording of each step in the lab processes, barcodes enhance quality assurance. This is essential for complying with regulatory standards and maintaining accreditation.
4. Data Integration
Barcodes facilitate seamless data integration with Laboratory Information Management Systems (LIMS). This integration ensures that data from various sources is consolidated and easily accessible for analysis and reporting.

Types of Laboratory Barcodes
There are several types of barcodes used in laboratories, each serving different purposes:
1. Linear Barcodes
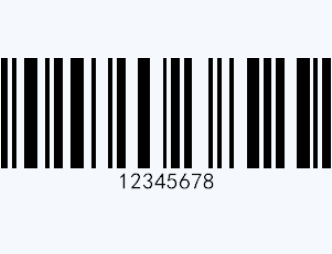
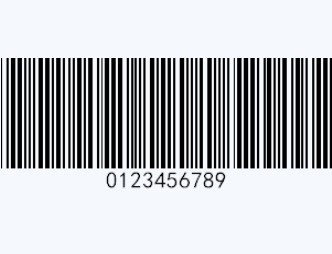
Linear barcodes, such as Code 128 or Code 39, are widely used in laboratories for their simplicity and reliability. They are ideal for labeling sample tubes, slides, and reagent bottles.

Code 128

Code 39
2. 2D Barcodes
2D barcodes, like QR codes and Data Matrix codes, can store much more information in a smaller space. These are particularly useful for labeling small items or when more detailed information needs to be encoded.
3. RFID Tags
Although not traditional barcodes, RFID (Radio Frequency Identification) tags serve a similar purpose. They can be read without direct line-of-sight and are used for tracking high-value or sensitive items in a lab.
How to Choose the Right Barcode Types for Your Lab?
Choosing the right symbology for your lab involves understanding the specific needs and constraints of your laboratory environment.
First, consider the type of items you will be labeling and the amount of information that needs to be encoded.
Linear barcodes, such as Code 128 or Code 39, are ideal for larger items that require simple identification.
They are easy to print and scan, making them suitable for labeling test tubes, reagent bottles, and equipment.
However, if you need to encode more detailed information or are working with smaller items like microscope slides or microtiter plates, 2D barcodes such as Data Matrix or QR codes are more appropriate.
These barcodes can store significantly more data in a compact space, providing greater flexibility for encoding complex information.
Additionally, consider the scanning environment and the required durability of the barcodes. In high-throughput laboratories where quick and accurate scanning is essential, choosing a symbology that is compatible with your existing barcode readers and Laboratory Information Management System is crucial.

What Type of Barcode Should Different Laboratories Choose?
1. Clinical Laboratories
Linear Barcodes (e.g., Code 128, Code 39): These are suitable for labeling test tubes, reagent bottles, and equipment where simple identification codes are needed.
Linear barcodes are easy to print and scan, making them ideal for high-volume settings where quick scanning is essential.
2. Research Laboratories
2D Barcodes (e.g., Data Matrix, QR Codes): Research labs often need to store more information in a smaller space, such as detailed sample data or experimental conditions.
2D barcodes are perfect for labeling smaller items like microscope slides and microtiter plates due to their ability to encode more data in a compact format.
3. Biobanks
2D Barcodes: These are also preferable in biobanks where there is a need to encode extensive information about biological samples, including their source, type, and storage conditions.
The compact size of 2D barcodes allows for efficient labeling even on small vials.
4. Pharmaceutical Laboratories
RFID Tags: While not traditional barcodes, RFID tags can be beneficial in pharmaceutical labs for tracking high-value or sensitive items.
RFID can be read without direct line-of-sight, offering robust tracking and inventory management for critical substances.
How to Implementing a Barcode System for Laboratory?
Successfully implementing a laboratory barcode system involves several steps:
1. Assessing Needs
Identify what needs to be labeled and tracked in your lab. This could include samples, reagents, equipment, and even personnel.
Understanding your needs will help in selecting the appropriate barcode technology.
2. Choosing the Right Barcode Type
Based on the assessment, choose the barcode type that best fits your requirements.
For instance, use linear barcodes for larger items and 2D barcodes for smaller items.
3. Selecting Barcode Software and Hardware
Invest in reliable barcode software and hardware. Barcode printers, scanners, and readers should be compatible with your laboratory management systems to ensure seamless integration.
4. Training Staff
Ensure that all lab personnel are trained in using the barcode system. This includes how to generate, print, and scan barcodes correctly.
How to Design Laboratory Barcode?
Designing a laboratory barcode involves several steps to ensure that the barcodes are clear, scannable, and effective for the lab's specific needs.
Here's a step-by-step guide to designing laboratory barcodes:
1. Identify the Information to Encode
● Sample ID: Unique identifier for each sample.
● Date and Time: Collection or processing timestamps.
● Source Information: Origin of the sample, such as patient ID or experiment details.
● Storage Conditions: Specific storage requirements or conditions.
● Batch Number: For reagents or chemicals to track production batches.
2. Choose the Barcode Format and Size
Format: Ensure the barcode format (linear or 2D) matches the type of data and item size.
Size: The barcode should be large enough to be easily scannable but small enough to fit on the item without obstructing other labels or information.
3. Select Durable Materials and Printing Methods
Materials: Use labels made from materials that can withstand laboratory conditions such as chemicals, moisture, and temperature fluctuations.
Printing: Opt for high-quality printing methods that produce clear, sharp barcodes. Thermal transfer printing is commonly used for its durability.
4. Ensure Compatibility with Scanning Equipment
Verify that the barcode symbology is compatible with your lab's barcode scanners.
5. Design for Readability
Clear Font: Use a legible font for any human-readable text accompanying the barcode.
Contrast: Ensure there is a high contrast between the barcode and the label background (typically black bars on a white background).
Quiet Zone: Leave a margin (quiet zone) around the barcode to ensure scanners can accurately read it.
6. Test the Barcode
Scanning: Test the barcode with your lab's scanners to ensure it reads correctly from different angles and distances.
Durability: Expose the barcode to lab conditions to check for resilience against wear and tear.
7. Implement and Monitor
Regularly check the barcodes for readability and replace any that become damaged or worn out.
Example: Designing a Sample Tube Barcode
Type: Choose a linear barcode (Code 128) for simplicity.
Information: Encode the sample ID, collection date, and patient ID.
Format and Size: The barcode should be 1 inch by 0.5 inches to fit on the tube.
Materials and Printing: Use durable polyester labels and thermal transfer printing.
Compatibility: Ensure the barcode can be read by the lab's handheld scanners.
Design: Use a high-contrast black-on-white label with a quiet zone around the barcode.
Testing: Verify that the barcode scans correctly and withstands handling and storage conditions.
Implementation: Train staff on applying and scanning the barcodes, and monitor their usage.
By following these steps, you can design laboratory barcodes that enhance sample management, reduce errors, and improve overall lab efficiency.
Case Study: Improving Lab Efficiency with Barcodes
A midsized clinical laboratory recently implemented a barcode system to manage its sample workflow. Before the implementation, the lab faced challenges with sample mix-ups and inefficient tracking. After integrating laboratory barcodes, the lab experienced a 30% reduction in processing time and a significant decrease in errors. The barcodes also improved traceability, enabling the lab to comply with stringent regulatory requirements more easily.
In the end, implementing a barcode system for laboratory is a strategic move that enhances accuracy, efficiency, and traceability in laboratory operations.
Whether you are managing a small research lab or a large clinical facility, barcodes can streamline your processes and improve overall performance.
Start leveraging the power of laboratory barcodes today with our barcode generator to ensure your lab's success and compliance.


